Tag Archive for: Light & Lens Flares

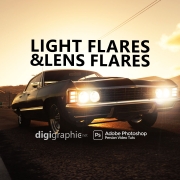
Light Flares & Lens Flares In Photoshop Tutorial

To Day we Want To Make Light Flares & Lens Flares In Photoshop Tutorial . We can Use this Flare Trick For poster and Photographys , Lens Flares Is Easy Work by Brush tool and gradients . we need to Use Blandign modes for This

Lens Flares In Photoshop

We have Lens Flare in Adobe photoshop By Default . but in This Tutorial We Want Do it In Other Ways . So Newer Forget To Subscribe My Channel and put Comment on This Video Thanks For Subscribe

Light Flares & Lens Flares In Photoshop Tutorial

Light Flares & Lens Flares In Photoshop Tutorial

We Can Make light Fler whit Photoshop Plugins too . we publish soon any videos for photoshop plugin tutorials specially light fler , lens fler . lens flare . light effects . lights flar . light flares and more … Create Light Flares in Photoshop | Lens Flares \ Lens Flares In Photoshop

DOWNLOAD

we make graphic design Video Tutorials every week and publish for free in this channel . we sale business graphic packages in our site . come and visit digigraphic.net Video photoshop tutorials of digigraphic.net we make logo design , photoshop tutorials , graphic tutorials , digigraphic , after effects , premiere , corel draw and more softwares

Adobe Photoshop is a raster graphics editor developed and published by Adobe Inc. for Windows and macOS. It was originally created in 1987 by Thomas and John Knoll. Since then, the software has become the most used tool for professional digital art, especially in raster graphics editing

How to Create Light Flares in Photoshop: A Step-by-Step Guide

Light flares can add a magical and dramatic effect to your images. Whether you’re working on a photo manipulation or just want to enhance your landscape shots, creating light flares in Photoshop can instantly elevate the mood of your design. In this guide, we’ll show you how to easily add stunning light flares and create a realistic lighting effect in Photoshop.

Why Add Light Flares in Photoshop?

Light flares, also known as lens flares, are commonly used in photography and digital art to simulate the effect of light hitting the camera lens. They add depth, focus, and energy to your images, making them more dynamic. Creating light flares in Photoshop is a great way to enhance your artwork and make it visually appealing by simulating the real-world phenomena of light scattering and reflection.

Steps to Create Light Flares in Photoshop:

1. Create a New Document or Open an Existing Image:

First, open the image you want to work on in Photoshop. You can either start with a blank canvas or use an existing photo. Make sure the background and elements of your image complement the light flare effect you want to achieve.

2. Add a New Layer for the Light Flares:

To ensure the light flares are non-destructive, create a new layer by going to Layer > New > Layer. This will allow you to work on the flare effect without altering your original image.

3. Choose the Brush Tool:

Select the Brush Tool (B) from the toolbar. Set the brush size to a large, soft round brush with low opacity. You may also want to adjust the brush hardness to 0% for a smoother effect. Choose a bright color, such as white or yellow, to mimic the light flare.

4. Paint the Light Flares:

On your new layer, begin painting areas where you want the light flares to appear. These can be points of intense brightness that simulate the light source. Use varying sizes of the brush to create different intensities of light and depth.

5. Apply Gaussian Blur:

To make the light flares look more natural, go to Filter > Blur > Gaussian Blur. Adjust the blur radius until the light flares have a soft, glowing appearance. This step helps simulate the natural spread of light.

6. Add a Lens Flare for Realism:

For a more realistic light flare effect, go to Filter > Render > Lens Flare. Photoshop offers several lens flare types to choose from. Adjust the flare brightness, position, and lens type until you achieve the desired look. You can also experiment with the screen blending mode for a more transparent effect.

7. Refine the Effect with Layer Styles:

For added dimension, try using layer styles such as Outer Glow or Inner Glow to enhance the light flares. Experiment with the opacity and size of these glows to make your light flares blend seamlessly with the rest of the image.

8. Adjust the Layer Opacity and Blending Mode:

To fine-tune your light flares, adjust the opacity of the layer and experiment with different blending modes, like Soft Light or Overlay, to achieve a more subtle or dramatic effect.

9. Final Touches:

Once you’re happy with the intensity and placement of the light flares, consider adding extra details like light reflections or adjusting the brightness/contrast to make the light flares more integrated into the overall composition.

Tips for Creating Stunning Light Flares in Photoshop:

  • Use multiple layers: Create several layers for different light sources or varying intensity to make the light flares more realistic.
  • Experiment with different colors: Light flares can come in various colors, depending on the type of light source (e.g., sunlight, neon, or artificial lighting).
  • Work with the image’s natural light: Ensure the position and direction of the light flares match the light source already present in your photo for a more cohesive look.
  • Use custom brushes: You can find or create custom brushes for light flares in Photoshop, which can offer more intricate and creative flare effects.

Conclusion

Creating light flares in Photoshop is a fantastic way to add dramatic lighting effects to your images. With the right tools and techniques, you can simulate realistic light scattering and enhance the atmosphere of your compositions. By following this step-by-step guide, you’ll be able to create beautiful light flares that transform your photos into works of art. Experiment with different techniques, and let your creativity shine!

How to add a lens flare in Adobe Photoshop.
  1. Open your photo in Photoshop.
  2. Create a new layer. Go to Edit › Fill, and fill it with 50% gray.
  3. Set the blending mode to Overlay.
  4. Go to Filter › Render › Lens flare. Select which type of lens flare you want to emulate.
  5. Position your lens flare, then click OK.